
I’m calling this section “Wing Finishing” and it has to do with all of the little finishing items to get the wing ready to cover. This includes fitting and installing the cap strip material on the top and bottom of the front spar and on the top and bottom of the aileron false spar.
It includes final assembly of the areas where the plexiglass fits over the cabin and in the lift strut areas.

It includes the bead blasting, priming and painting of the final fittings, installation of the aileron pulleys, fabrication of new cables, installation of the pitot tube, and running of the pitot/static lines. Installation of the leading edge skins and the mahogany plywood in the tip area.


Views above of the cap strip on the front spar and final sanding and shaping complete. Lots and lots of sanding with the tools below.

Starting on the leading edge skins, I decided to tackle the compound curves of the outer skins. First step was to make paper patterns. The puckers in the paper are areas that need shrinking.
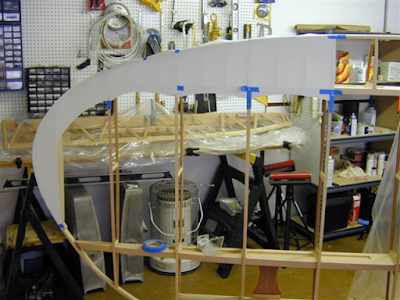
I didn’t have shrinking tools, but George Evans did at Evans Aviation. The only problem was that George’s shop is 100 miles from my hangar. So, I decided to make a buck, which exactly duplicates the shape of the outer wing, both left and right side. I took the buck and the trimmed pieces down to George’s shop and did the initial shrinking.

Patterns for wing tip area made and ready to be cut from aluminum sheet.

First pass at shrinking the outer skin. It fit very nice at the bottom, but needed more shrinking at the top.

The outer skins are fit and I’m starting to work on the next set of inboard skins.

Next set of skins cut, fit and ready to be nailed on.

I used ratcheting cargo straps and some strips of wood to make sure the skins were laying down nice before nailing them on. This was done in 95+ degree Arizona heat.

The center section skins were cut and fit, but can’t be installed until I’m ready to mate the wing to the fuselage and drill for the wing attach fittings.

No comments:
Post a Comment