
The gas tanks were in reasonably good shape all things considered. They have been sitting in hangars open, for over 40 years. So, they have dirt in them: wasp nests, some droppings and a variety of dead bugs. They will need some serious cleaning up. The quick drains were plugged with brass plugs, way over tightened and impossible to get out. This necessitated center drilling the plug, followed by successively larger bits until I could begin to re-tap the 1/4 NPT threads in the welded bung. I only have one gas cap, seen to the right, and it looks like a one-off piece machined out of a billet of aluminum.
I needed new gas caps. Len Hebert posted this note on the Monocoupe Facebook page about the correct cap to order.

Here is a link to order the gas caps. It is important to get these specific ones, they seem to be the only ones available with the splash guard on the inside of the cap. There are plenty of cheaper ones available but they don’t have the splash guard.

The gas gauges are from a Model A Ford and readily available from Model A restoration sites, including the gasket sets, new glass and floats.
Float wire is different shape than new units to avoid hitting tank baffles.


New gas gauges are readily available. As are gas gauge rebuild kits. Upon further inspection of the right gas tank, which had been involved in a tip over accident, resulting in some very mild deformation of the top of the tank, I found that the Model T gas cap didn’t fit like it was supposed to. Also, the threads in the cap flange were totally worn out. In fact, someone had drilled a hole at a 45 degree angle into the flange to act as a “set screw” to hold the machined cap (in the first picture above) in place.

This forced me into a position of replacing the gas cap flange. Using the Monocoupe plans I was able to get replacements machined. Gas cap flange and new Model T cap left. Also, after weeks and weeks of soaking the gas gauge nut in every known brand of frozen nut liquid, I decided it was necessary to replace the gas gauge flange as well. New gas gauge flange and original retaining nut left.


I took the gas tanks down to Phoenix, to Shawn Jarrell, Jarrell Aircraft Fabriction, and had Shawn weld in the gas cap flange and the gas gauge flange.
Shawn also has a test rig to test the tanks for leaks and both tanks checked out good.
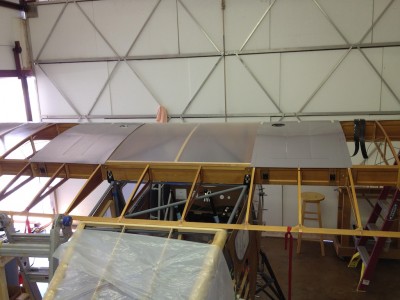
While I was down at Shawn’s we used his 8′ shear to trim the gas tank covers to final size and then his bead roller to set two beads down the center of each tank cover. Triangulated for the hole for the gas cap in each tank cover and cut that out. Cut and fit the skylight. The tank covers overlap the skylight acting as the “trim” strip at that point.
Gas gauge assembly sequence:

No comments:
Post a Comment